Because PDFs are used for many things, often times you need to figure out the best way to make them smaller. Suppose, for example, you have created a PDF file with a lot of images for a catalog. You’ve carefully prepared a press-ready PDF you can send to the printer.
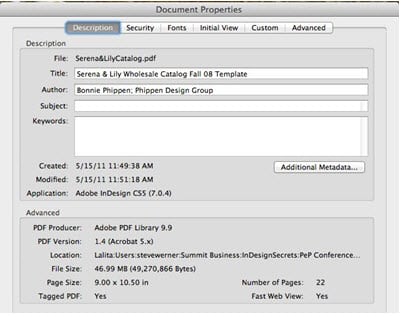
But you also need to send proofs of the catalog to the client, or to others. You can choose to examine the file size by choosing File > Properties > Description. In the Advanced section, you can see the size is 46 Mb. This is too large to easily send. What do you do?
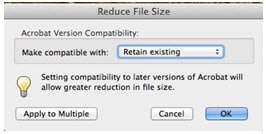
There are two commands you can use in Acrobat Pro to reduce the size of a PDF. The first one is very simple, but it won’t necessarily give you the best results. In Acrobat 9 Pro, choose Document > Reduce File Size. In Acrobat X Pro, choose File > Save As > Reduced Size PDF. In Acrobat XI Pro, choose File > Save as Other > Reduced Size PDF. It only gives you the option of Acrobat compatibility. It reduces the size to 17 Mb. There are no controls to make it smaller.
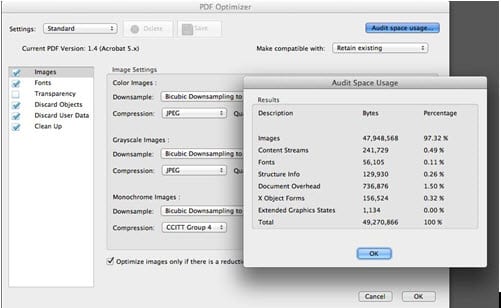
The best choice is the PDF Optimizer. It gives you the ability to “audit” the space size to help figure out what’s making the file size large. You have many settings to refine the reduction of size. And you can create settings that you can reuse again to repeat the same process.
To get to this command, in Acrobat 9 Pro, choose Advanced > PDF Optimizer. In Acrobat X Pro, choose File > Save As > Optimized PDF. In Acrobat XI Pro, choose File > Save as Other > Optimized PDF. This illustration shows the Audit Space Usage button has been clicked, and we can see that images are causing the large file size. By using the Downsampling command on the Images panel, you can choose an appropriate resolution. I chose 100 ppi. I brought the file size down to 4.67 Mb!
Need help with your print? Talk to a live print expert today: 800-930-7978.


