• Skip to primary navigation
  • Skip to main content
  • Skip to footer
Printing for Less

Printing for Less

At Printing for Less, we've offered high quality online printing services since 1996. Shop business cards, booklets, stickers, and more!

P F L.com
My LoginMy Login
800-930-2423
  • Printing
    • Postcards
    • Catalogs
    • Brochures
    • Folders
    • Letters
    • Newsletters
    • Envelopes
    • Greeting Cards
    • Print Templates
    • All Products
  • Direct Mail
    • Why Direct Mail Marketing?
    • Every Door Direct Mail® Postcards
    • Direct Mail Letters
    • Catalogs & Booklets
    • Marketing Gifts & Kits
    • Direct Mail Automation
  • Services
    • Mailing Services
    • Design Services
    • Custom Printing Services
    • Reseller Program
  • Industries
    • Advertising & Design
    • Enterprise
    • Food & Beverage
    • Healthcare Payers
    • Healthcare Providers
    • Nonprofit
    • Real Estate
    • Retail
    • Technology
    • University
  • Resources
    • Direct Mail Marketing
      Resource Center
    • Printing Resource Center
    • Blogs
    • Templates
    • Video Library
  • Get a Quote

Design & File Preparation

Choosing the Best PDF Preset in InDesign

Choosing the Best PDF Preset in InDesign

InDesign provides PDF presets so that you have fewer choices to make (and fewer details to actively remember). Presets group multiple panels of choices into the most common combinations for various workflows, such as commercial printing, desktop printing, and digital publishing.

But can you really trust a preset to take care of the piece you worked so long and hard to create? At the same time, how in the world would you expect to remember all of the available print options every single time you need a PDF?

Don’t worry about the learning curve; InDesign’s PDF presets aren’t standalone. If you’ve used other Adobe Creative Cloud applications to generate PDFs, you’ll likely notice something familiar about InDesign’s available preset options. You’ll find the presets in similar places when creating PDFs from both Illustrator and Photoshop.

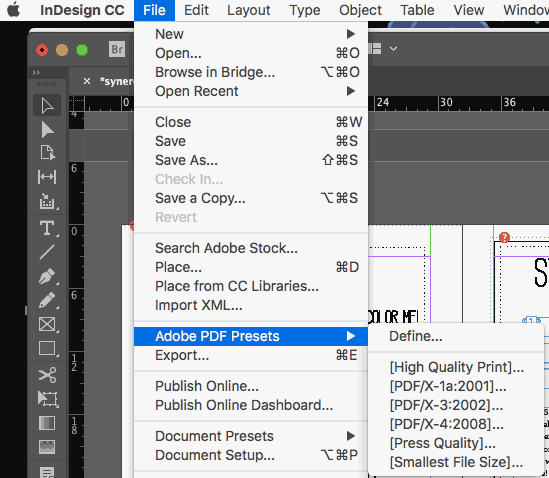
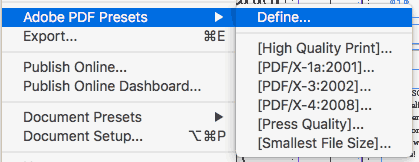
You can quickly access InDesign’s PDF presets right from a flyout in the File menu. Go to File –> Adobe PDF Presets, and you’ll see all of your options right there.


InDesign pdf presets dialog


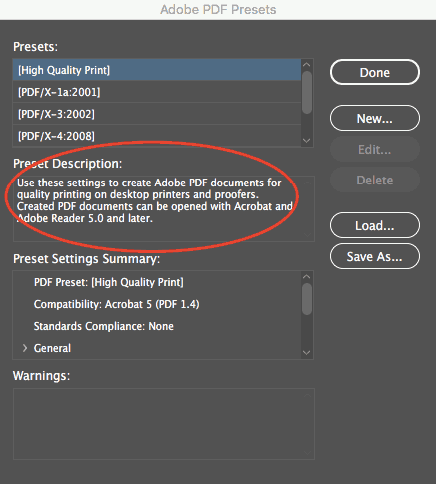
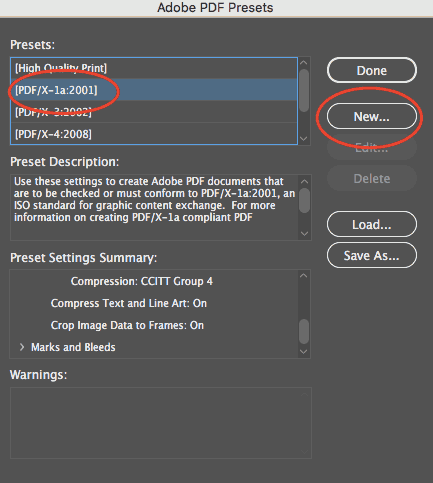
If you ever need a quick reminder of what a particular preset does from within your InDesign document, you can choose File –> Adobe PDF Presets –> Define, and as you choose each preset, you’ll see a straightforward “Preset Description” right there in the dialog box.


pdf quality settings


Let’s go ahead and look at the best applications for each.


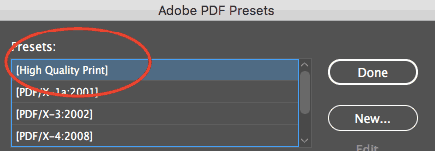
“High Quality Print” PDF Preset

According to InDesign, this preset will produce PDF files suitable for “high-quality printing on desktop printers and proofers.” What settings are most suitable for this particular application? Both color and grayscale images above 300 ppi will be downsampled to 300. Colors are left alone, so RGB and CMYK images will each remain in their native color spaces.

All transparency settings will also be left alone. Note that Acrobat and Acrobat Reader 5 are the minimum versions required for compatibility with these preset settings (which shouldn’t be a problem these days).


pdf presets high quality


What is PDF/X?

PDF/X standards are the best choice when your printer hasn’t provided you with specs. They’re a safe bet if you want to be sure your printer will be able to open your file, while also minimizing any printing errors. Adobe developed this set of ISO standards for print workflows by addressing input from other industry professionals and vendors. Because these standards are geared toward producing more universal print-ready PDFs, printers will often take the easiest route and encourage clients to choose the PDF/X presets.


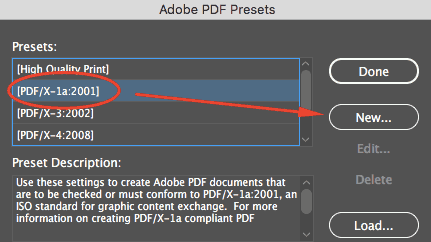
“PDF/X-1a:2001” PDF Preset

PDF/X-1a:2001 takes away compatibility with Acrobat 5 and downgrades it to Acrobat 4. All of your colors (whether RGB or CMYK) will automatically be converted to CMYK, although any spot colors you’ve set will stay intact.

You’ll also need to be proactive about transparency flattening, and may want to specify your own settings for transparency treatment.

To do this, you can go to File –> Adobe PDF Presets –> Define as shown above, then choose “PDF/X-1a:2001” and click the “New” button.


pdf presets pdf x-1a:2001


Then, select “Advanced” from the left menu and use the “Transparency Flattener” down to make your choice.


pdf presets transparency flattener


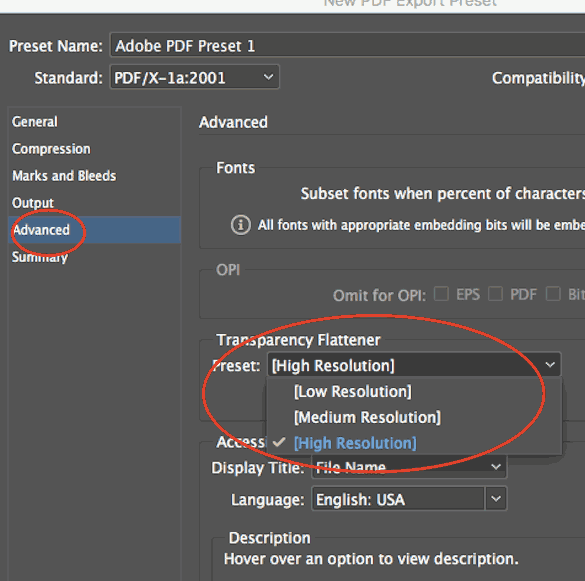
The “High Resolution Transparency Flattener” preset will best maintain the quality of your text and vectors, if that’s what you want. All images above 300 ppi resolution will be downsampled to 300 ppi if you have they’re higher.


adobe pdf presets settings


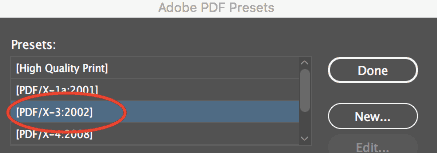
“PDF/X-3:2002” PDF Preset

Again, with this preset, your transparency will be flattened. If you want to choose your transparency settings proactively, you can follow the same instructions as above. PDF/X3:2002 is like the previous PDF/X setting, except it allows embedded RGB profiles to remain (no automatic conversion to CMYK).

It’s a helpful setting if your printer is planning on optimizing the color based on the printing environment. European printers tend to make more use of this format than American printers.


pdf presets pdf x-3:2002


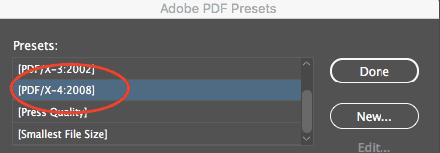
“PDF/X-4:2008” PDF Preset

With this PDF/X present, since compatibility is set to the more recent Acrobat 7, you’ll be able to keep any transparency in your document intact.

This is the biggest advantage of the PDF/X-4:2008 formatting. You’ll also be able to maintain the quality of any high resolution images. Color-wise, you’re allowed to use RGB, CMYK, and greyscale. Your spot colors will stay intact, and you can even continue to use LAB or ICC profiles.

pdf presets pdf x-4:2008


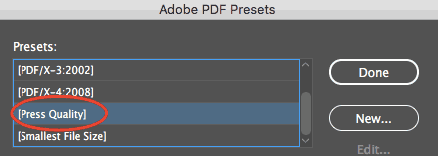
“Press Quality” PDF Preset:

This is another bundle of settings that’s often commonplace when working with high-quality commercial printers. This preset will allow you to keep all transparency live in the document (no flattening required). Adobe Acrobat works well with live transparency, and also creates satisfying separations, so a printer who works out of Acrobat will be happy with any file output this way. It will be compatible as far back as Adobe Acrobat 5. Any RGB values will be converted to CMYK, and all images will be downsampled to 300 pp in cases where the actual resolution is higher.


adobe pdf presets press quality


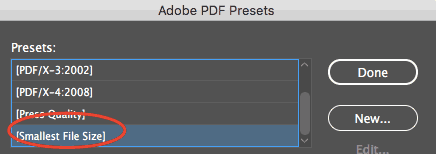
“Smallest File Size” PDF Preset:

“Smallest File Size” is most important where size matters, and size matters most on the web. In order for your document to be accessible to as much of your audience as possible, you’ll want to choose this preset for anything you’re planning to send via email or display on a screen.

Anything that’s both color and high resolution will automatically be downsampled to 100 ppi. Grayscale images can stay as high as 150 ppi. You’ll be able to play well with anything as far back as Acrobat 6, and you can keep your transparency and any layers intact.


pdf presets smallest file size


Custom InDesign Presets

The above settings will satisfy your print-worthy document needs almost all of the time, especially when you’re part of a professional environment using a typical print workflow. If, however, you have special considerations (or just want to get fancy), there’s more than one way to customize presets for your needs in InDesign.

We don’t need to cover every possible preset customization, but here are a couple of suggestions for more common needs:

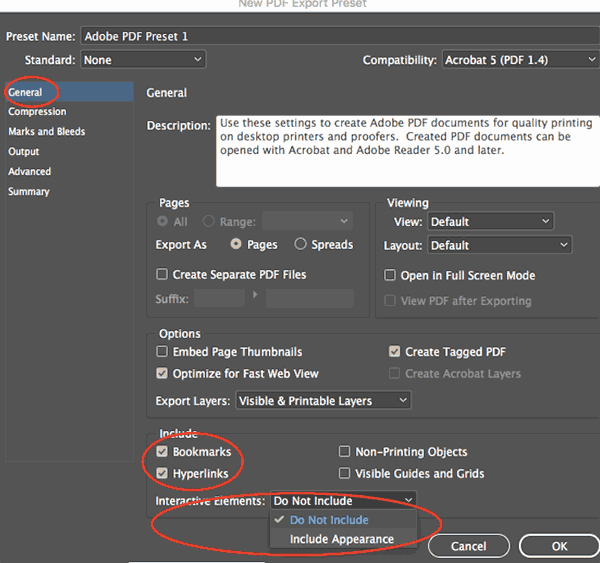
  • If you need to make your InDesign files interactive once saved as PDFs, you can go to File –> Adobe PDF Presets –> Define, then choose your preset setting and hit “New.”
define adobe pdf presets
pdf presets new preset
 
  • Then, choose “General” from the left side menu and pick your desired Hyperlinks and Interactive Elements from the bottom of the dialog:
pdf presets new export preset
 
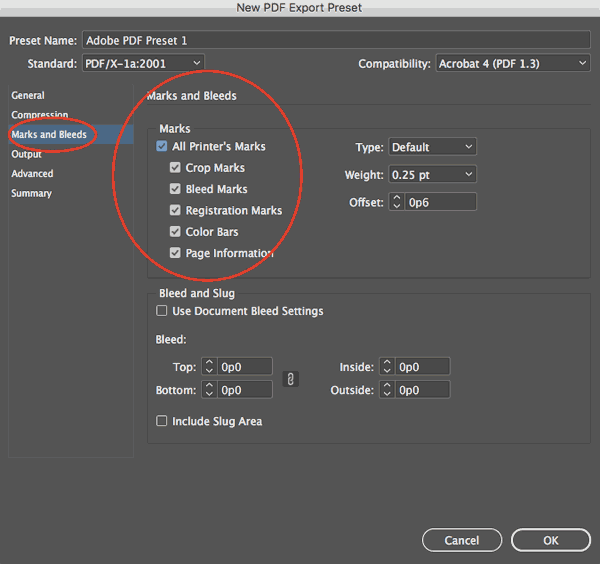
  • If your printer is asking you for crop marks, bleed marks, or other printer’s marks, you can go to File –> Adobe PDF Presets –> Define, then again choose your preset setting and hit “New.”
pdf presets pdf x-1a:2001 new preset
 
  • Then, in the dialog box, choose “Marks and Bleeds” from the left side menu and check the box for “All Printer’s Marks” in the top section.
adobe pdf presets all printers marks


Saving Your PDF Preset

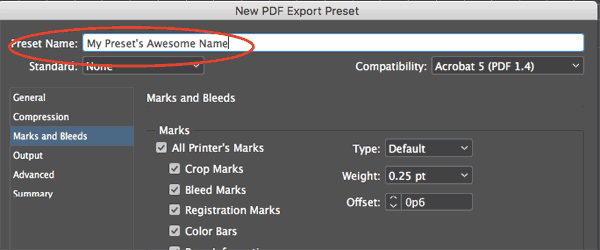
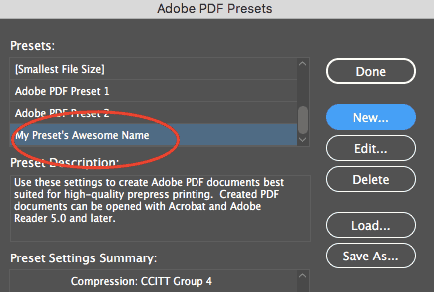
Once you’ve added your additional customizations to any of the PDF Presets in InDesign, you’ll want to name your preset in the top field of the dialog box.

pdf presets save preset
 

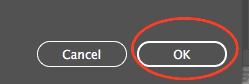
Then, click the “OK” button at the bottom right of the dialog box.


pdf presets ok
 

Your preset will have automatically been added to the Adobe PDF Presets dialog.


pdf presets list of presets

Congratulations, and happy customizing!


Need creative or technical advice on working with your PDF?
Call our helpful experts now at 800-930-6040

Subscribe to our weekly newsletter and get an instant 20% off your first print project.

Name(Required)
This field is for validation purposes and should be left unchanged.

RELATED MARKETING & DESIGN TIPS

Premium Paper

Premium paper is sometimes referred to as designer paper, fancy paper, or specialty paper. Regardless of what you call these quality papers, Printing for Less is ready to help you decide which paper best suits your personal printing project.

Read More >


Business Card Design Do’s and Don’ts

Create a better and more succesful Business Card with these Design Do’s and Don’ts

Read More >


4 Color Process Printing

Explanation and description of how four color process printing works and how a color separation is made.

Read More >


CD Cover Size Specifications

CD Cover Size Specifications

How to Create your Own Custom CD Covers

CD Cover designs

Need custom CD covers for your corporate presentation or sales tools? Follow these simple CD cover size specifications to create the graphics for an eye-catching and informative CD jacket. And check out other products such as Presentation Folders and Brochures to help market your business.

It’s easy to produce a professional looking CD cover printed inside and out using whatever software tools you have on your computer. You can start from scratch in any layout program including Microsoft Word, Publisher or PowerPoint as well as traditional graphic arts programs such as Adobe Photoshop and Illustrator. Just use the simple diagram below to size your file and create any needed bleeds.


CD Cover Size Specifications for Printing

The finished dimensions for the outside of printed CD covers are 4.724 inches square. Many printed designs include bleed. The “bleed area” is an extra 1/8″ of space for design elements or backgrounds to extend beyond the finished size of your piece. A CD cover with bleeds is printed slightly oversized (4.974 inches square) and then cut down to size, giving the appearance that the printing “bleeds” off the edge of the cover rather than having a white border.

The finished dimensions for the inlay card are not square to accommodate the folded part needed to make the spines on each end. The inlay card creates the cover for the back and both spines, while the CD Cover inserts into the lid of the CD case.


CD Cover and Inlay Card

CD Cover Size Specs
CD Inlay Card Size Specs


Printed CD Cover Design Tips

When creating your CD cover design file, use these tips:
  • Make the document page size equal to the cover size plus the bleed area or 4.974″ x 4.974″ to be trimmed down to the finished size after printing. If you aren’t planning to include bleeds, the bleed area isn’t necessary so set the document size to the finished size of 4.724″ square.
  • Play it safe near the borders. Because cutting may vary ever so slightly, it’s a good idea to keep all of your valuable text and logo information within the design safe zone. This zone is the 1/8 inch around the margin of your cover or inlay card.
 
Need help with your CD cover or other printing project?
Give us a call now at 800-930-2423!
Get Instant Pricing on CD Cover Printing

Subscribe to our weekly newsletter and get an instant 20% off your first print project.

Name(Required)
This field is for validation purposes and should be left unchanged.

RELATED MARKETING & DESIGN TIPS

Text and Type for Printing

Tips and advice on how to work with text in your graphic arts files used for full color commercial printing

Read More >


Complete Guide to Creating Press Ready Print Files

We put together everything you need to know about creating a successful commercial print ready file. Learn about bleed, color, image formats, folds, & more.

Read More >


How To Make A Super Brochure Or Mailing Piece

Super brochures or mailing pieces can be a great way to advertise your business, as long as you have the right design in place. Get tips from our experts!

Read More >


USPS Mail Layout Templates

USPS Mail Layout Templates

Planning to send EDDM® mail through the USPS? Use these templates to prepare your EDDM® postcard, brochure, newsletter or greeting card design to comply with USPS regulations and guidelines.


Mailing pieces require clear space (free of any design elements) to allow for barcoding, addressing and permit imprinting. This ensures both that the mail piece is eligible for your preferred mail service class and that any content in your piece isn’t covered up in the addressing and mailing process.

Sometimes it takes a creative design to accomplish your vision while remaining compliant with the USPS mailing regulations. We offer print design services so you can work with our expert graphic designers on USPS layouts, then print and mail your marketing materials all through one partner – Printing for Less.

If you’ve used a template to design your mailing materials and now just need to get them sent out, we can help with that, too. See our Mailing Services Guide for service class options, frequently asked questions and lots more information on mailing your marketing materials.

USPS Compliant Mailing Templates

The following templates are great resources for creating your EDDM® marketing materials to be mailed through USPS. If you have questions about preparing your project or need help using any of the templates, call our printing experts – we’re happy to help!

EDDM® Postcard Mailing Templates

4.25 x 10.625 Postcard
4.25 x 15 Postcard
6.25 x 9 Postcard
6 x 11 Postcard

EDDM® at a Glance

  • 70% off direct mail postage. EDDM route picker
  • Saturate entire zip codes or carrier routes.
  • No mailing list needed!
  • No postage permit needed!
  • Affordable for any size business.

We make mailing easy! Learn more about EDDM®

Brochure and Newsletter Mailing Templates

8.5 x 11 Brochure or Newsletter Half Fold
8.5 x 11 Tri Fold Brochure or Newsletter
8.5 x 14 Half Fold Brochure
8.5 x 14 Tri Fold Brochure
11 x 17 Half Fold Brochure or Newsletter
11 x 17 Half Then Half Brochure or Newsletter
11 x 17 Tri Fold Brochure or Newsletter

Postcard Mailing Templates

4.25 x 5.5 Postcard
4 x 6 Postcard
5.5 x 8.5 Postcard
5 x 7 Postcard
6 x 9 Postcard
6 x 11 Postcard

Envelope Mailing Templates

5.25 x 7.25 Greeting Card Envelope
4.375 x 5.75 Note Card Envelope

Catalog Mailing Templates

5.5 x 8.5 Catalog or Booklet
8.5 x 11 Catalog or Booklet

Order USPS Postcards

Subscribe to our weekly newsletter and get an instant 20% off your first print project.

Name(Required)
This field is for validation purposes and should be left unchanged.

RELATED MARKETING & DESIGN TIPS

File Upload

Read More >


Claim Your Gift

Cheers to more moments that spark joy and peace of mind this holiday season! As a part of Printing for Less’s deep appreciation for your partnership, we have a holiday gift just for you.

Read More >


Printing Terms & Glossary

A glossary of terms used in the graphic design and commercial printing industry from Printing for Less. Learn the definitions of important printing terms! of collate printing, ream, and more.

Read More >


Packaging: Box Dimension Guidelines

Packaging


To determine the propper length, width and depth, place the carton facing you with the opening pointing up (as if the carton was going to be filled from above). packaging box dimension diagram

  1. Measure length first:
    Open package – the length is the larger of the two dimensions around the open end.
  2. Width is the smallest dimension around the open end.
  3. Depth is the distance between the two ends.
 
PrintingForLess.com has dedicated experts ready to help bring your idea to life.
Call 800-930-6040 now to discuss your project.

Subscribe to our weekly newsletter and get an instant 20% off your first print project.

Name(Required)
This field is for validation purposes and should be left unchanged.

RELATED MARKETING & DESIGN TIPS

Printing Production Speed

Excited about your print marketing order? We are too! Learn more about our print production turnaround times, track your order, and more. See more.

Read More >


Claim Your Gift

Cheers to more moments that spark joy and peace of mind this holiday season! As a part of Printing for Less’s deep appreciation for your partnership, we have a holiday gift just for you.

Read More >


Printing With Metallic Ink

When you venture beyond the familiar territory of cyan, magenta, yellow, and black, a wide world of color possibilities opens up for you.

Read More >


About RGB and CMYK

Important Information About RGB and CMYK

Many graphics software programs give you the choice to work in either RGB or CMYK. These are called “color spaces”. Scanners, phones, and digital cameras create images using combinations of just three colors: Red, Green and Blue (called “RGB”). These are the primary colors of light, which computers use to display images on your screen. Printing presses print full color pictures using a different set of colors, the primary colors of pigment: Cyan (blue), Magenta (red), Yellow and Black (called “CMYK”). This is “4-color process” or “full-color” printing that comprises the majority of magazines and marketing materials you see every day.


It’s Best If You do the RGB-to-CMYK Conversion of Your Images

You will have more control over the appearance of your printed piece if you convert all of the images from RGB to CMYK before sending them to us. When we receive RGB images, we do a standard-value conversion to CMYK, which may not be perfectly to your liking. We want you to be happy, so please, take the time to prepare your file properly. We cannot be responsible for sub-par results if you furnish your images in RGB. Even though monitors always use RGB to display colors, the colors you see on your monitor will more closely match the final printed piece if you are viewing them in the CMYK color space.

Be aware that it is possible to see colors in RGB that you can’t make with CMYK.

They are said to be “out of the CMYK color gamut”. What happens is that the RGB-to-CMYK translator just gets as close as possible to the appearance of the original and that’s as good as it can be. It’s something that everyone in the industry puts up with. So it’s best to select any colors you use for fonts or other design elements in your layout using CMYK definitions instead of RGB. That way, you will have a better idea of how they will appear in your printed piece. Here’s a common example: many programs translate the 100% Blue in RGB into a somewhat purple-looking color in CMYK. We recommend a CMYK value of 100-65-0-0 to get a nice clean blue. Working in the CMYK color space allows you to select the CMYK recipe, or “screen build”, that gives you the results you want.


Here are some examples of how various RGB colors to CYMK:


rgb colors

rgb colors
(what you see on screen)

cmyk colors

cmyk colors
(printing inks will do this)

how rgb colors print

rgb colors
(what you see on screen)

how cmyk colors print

cmyk colors
(printing inks will do this)


You most likely won’t notice this kind of color shift in a color photograph.

It is more likely to happen if you pick a very rich, vibrant color for a background or some other element of your layout. It probably won’t look bad, it just won’t look exactly the same. But it may not be noticeable at all either.
To purchase a color guide with over 3,000 process colors and their CMYK screen percentages visit the CreativePro Pantone store.


Converting to the CMYK Color Space

Here is a list of several common programs with instructions on how to make sure you are working in the CMYK color space. If your program or version is not listed here, don’t worry. Most of these instructions will apply to all versions of a program. If at any time you need further help, please call us for assistance. We are happy to talk you through the steps needed to get your document into the CMYK color space.

Microsoft Publisher 2000

Microsoft Publisher defaults to RGB. It is easy to convert everything to a CMYK color space or to start a new document using the CMYK color space.

Use the following menu options: Tools/Commercial Printing Tools/ Color Printing and select Process colors (CMYK). Please note that all images incorporated into a layout need to be linked and not embedded in order to maintain the CMYK color space within the image. Using the following menu options does this: Tools/Commercial Printing Tools/Graphics Manager and highlight the embedded image. Click Link and click Browse to locate the original file and link to it. You will then need to send both the images and the layout file to us for printing.

Microsoft Publisher 2003-2007 or later

Select File Tab, then select Info. Select Commercial Print Settings. Select Choose Color Model, then Select Process Colors (CMYK)

Adobe Photoshop

If the file already exists select the following menu options: Image/Mode/CMYK When starting a new file select CMYK for the mode before clicking OK.

Corel Draw

Select each object you want to convert. Select the Fill tool and click Fill Color Dialog. Make sure the Color model is CMYK. For each object with an outline: Select the Outline tool and click the Outline Color Dialog. Make sure the Color model is CMYK.

Adobe Illustrator

Select File/Document color mode/CMYK color

Quark Xpress

Use the following menu options: Edit/Edit Colors/Show Colors in Use/Highlight Color and click Edit. Change model to CMYK and deselect Spot color. Remember to send us your layout and linked images!

Adobe InDesign

Use the following menu options: Window/Swatches and Window/Color. Double click color in Swatches Change color mode to CMYK and color type to Process. Any colors created in the document that are not in the Swatches palette, need to be changed to the CMYK color space. Select each object you want to convert and make sure the Color palette reflects the CMYK percentages. Click top right arrow in the palette to change to CMYK if necessary. Remember to send us your layout and linked images!

Adobe Pagemaker

Use the following menu options: Window/Show Colors. Double click “colors” in palette and select Model to be CMYK and Type to be Process. Please be advised that Pagemaker does not successfully represent CMYK color on the monitor.

The following programs do not have the capability to convert to CMYK. No worry, we will convert it for you free of charge!

Adobe Photoshop LE
Adobe PhotoDeluxe
Microsoft Word
Microsoft Excel
Microsoft Powerpoint
Microsoft Works
Microsoft PhotoDraw
Picture It Publishing


If you do not see your program listed here, or are having difficulty converting RGB to the CMYK color space, please call us at 800-930-2423 for further assistance.

For more info on color see: Guide to Using Color and Ink in Commercial Printing


Subscribe to our weekly newsletter and get an instant 20% off your first print project.

Name(Required)
This field is for validation purposes and should be left unchanged.

RELATED MARKETING & DESIGN TIPS

Scented Printing

Scented printing offers a whole new dynamic to the customer experience! Great for sampling fragrances or creating a lasting impression. Smell our options!

Read More >


Sequential Numbering Printing

Get sequential numbering printing on carbonless NCR forms, tickets, purchase orders and other items with numerous options

Read More >


Innovative Print Marketing Design Ideas

Examples of innovative ideas to enhance your print marketing with numerous custom printing options

Read More >


Build a Calendar in InDesign

Build a Calendar in InDesign

Everyone needs a calendar sooner or later. Learn how to easily build one inside InDesign using a script we’ve provided for you.
by: David Blatner

I’m always amazed at how many people need to make calendars: big calendars, small calendars, one-month calendars, full-year calendars. Fortunately, InDesign offers a “make me a calendar” feature… no, sorry, not really. But it’s so easy to make a calendar in InDesign that it’s as though the program did have such a feature. The trick is to download a template or script that does a lot of the work for you.


Use a Template

One of the best and easiest ways to make a calendar is to use a template designed by someone else. Search for the word “calendar” in the InDesign section at the Adobe exchange and you’ll find a number of free templates.
 
While most are year-specific, there are a couple called “25-year calendars,” such as the clever one rusty Wright built. these contain 28 different master pages, each of which reflect one possible month layout. For example, if January 1 begins on a Monday, you’d apply that particular master page layout to your January document page.
 
You can also find calendar templates for a small fee. Chuck Green’s The InDesign Ideabook includes several calendars on its accompanying disc. note that most of these templates have paragraph styles for each calendar element, so changing the typefaces and overall look and feel of the calendar is typically as simple as editing a few styles.
 

Use a Script

If you need more flexibility than a template offers, consider using a script to build your calendar for you. One of the most popular and easiest scripts available is called Calendar Wizard, written by Scott Selberg (based on ideas and code written by Jan Suhr, Robert Cornelius, and Steve Nichols). Here’s how it works.
 

InDesign Scripts panel1 – Download, install, and run

Calendar Wizard is available here.InDesign Scripts panel
 
After you download and unzip it, install it by putting it inside the InDesign > Presets > Scripts folder (in CS2) or inside the InDesign > Scripts > Scripts Panel folder (in CS3).
 
Note that this gives you four files: the script to make the calendar, a script to realign the calendars, a script to fit a calendar to a frame, and a readMe file with lots of good information on how the script works and how to use it.
 
After installation, you’ll immediately find it in InDesign’s Scripts panel (Window > Automation > Scripts). To run it, double-click on it in the panel (Figure 1). If you get an error at this point, simply open a document, then double-click on the script again.
 

2 – Choose the Date Range

The first two items in the Calendar Wizard dialog box (Figure 2) are straightforward: They let you choose the starting and ending months and year(s) for your calendar. You can pick any year from 2004 to 2017. If you were hoping for 2018, you’ll have to wait until next year; the script looks only 10 years ahead.
 
InDesign Calendar Wizard
 

3 – Pick the Calendar Options

You can choose English, German, French, or Spanish from the Language pop-up menu to change the way the text appears (Figure 3). Next, pick whether you want the left column to be a Sunday or a Monday.
 
Note that some months take up only five rows and some take six. (If February 1 lands on a Sunday, it’ll take 4 rows.) In general, you should choose Auto from the Date Rows pop-up menu, but if you want to force all the months to the same number of rows, you can choose that here.
 
If you turn on the Include Mini-Calendar checkbox, you’ll get small versions of the previous and next month’s calendars inset into each month’s calendar. This takes longer to build and creates many more objects on your page, but it can be a good addition to one-month-per-page wall calendars.
 

Adding Holidays to Your Calendar

While version .9 of Calendar Wizard is on the Adobe Exchange, the script’s author, Scott Selberg, has provided us with the newest version of Calendar Wizard at http://downloads.indesignmag.com/ supportfiles/. Version 2.0 has several new features, including creating and applying table styles and the ability to insert the names of holidays into the proper date locations automatically.
 
The trick to adding holiday names to your calendar is to type them using a special format into an InDesign text frame. Each holiday should be on its own line, and in this format:
1-1:New Year’s Day
2-14:Valentine’s Day
 
Don’t put a zero at the beginning of each month! Just the month, hyphen, then date.
 
You can find lists of holidays on the Web at timeandate.com and on Wikipedia.
 

4 – Choose Layer Options

One of the coolest things about CalendarWizard is that it can make good use of the Layers panel. If you turn off all the checkboxes in the Layer Options section, the whole calendar is placed on Layer 1. However, I prefer to turn on all three checkboxes to produce the following:
  • The calendar grid (along with numbers and text) on a layer called “calendar”
  • An empty duplicate of the grid on a layer called “calText,” which lets you easily add text at the top of each calendar cell.
  • An empty duplicate of the grid on a layer called “calHolidays,” which lets you easily add the names of holidays at the bottom of each cell. If you add holidays automatically (see the sidebar “Adding Holidays to Your Calendar”), this layer is always created for you.
 

5 – Pick a Page Setup

The last settings in the dialog box control how calendars are laid out on the page. You can pick how many months should fit on each page, whether the page layout should be portrait or landscape, and whether to create a new document or fit the calendar into the current document (Figure 4).
 
If you had a text frame selected on your page when you launched the script, you can also choose Current Text Frame from the Page pop-up menu. In that case, the script places the calendar (but only a single month) into that frame. That’s particularly handy when you need a calendar to fit a specific size and position on your page. When the pop-up menu is set to Auto, and you have a text frame selected, the script automatically places the calendar into that frame.
 

6 – Create the Calendar

When you click OK, the script jumps into action and builds the calendar (Figure 5). This can take up to a minute or more (especially with minicalendars), so be patient.
 
Unless you’ve targeted a text frame for a singlemonth calendar or you have a text frame selected in your current document, the script builds a new document for you. The size and margins of that document are based on the last-used document preset (that is, whatever you last chose in the Document Preset pop-up menu in the New Document dialog box).
 

7 – Add Custom Text

This script creates calendars as tables inside text frames. The numbers and text are in the cells of one table, and—if you added a calHoliday layer or a calText layer—you’ll find one or more duplicate tables on other layers. If you want to insert additional holidays into the calendar, open the Layers panel and Option/Alt-click on the lock column next to calHolidays layer (Figure 6). This locks all the other layers, and leaves this layer unlocked. Now you can click with the Type tool inside a table cell and type the holiday. Similarly, to add to the Text layer, Option/Alt-click next to the calText layer to lock all the other layers.
 

8 – Format the Calendar

The calendars that CalendarWizard creates aren’t exactly beautiful right out of the box. Fortunately, the script builds a number of paragraph styles, table styles (CS3 only), and color swatches. Edit the styles and your calendars update to look far better. If you’re going to print your calendar, check the color space of the three color swatches it creates: DayCellBackground, DayTextColor, and Holiday. In the publicly available version .9, they’re all specced as RGB colors. If you use the script attached to this PDF, they’re likely in CMYK mode. But if they’re RGB, then right-click (or Control-click with a one-button mouse on a Mac) on each of these colors in the Swatches panel, choose Swatch Options, and set the Color Mode to CMYK. The two DayCell swatches control the color of the text and the cells behind the day names (“Monday,” “Tuesday,” and so on). The Holiday swatch controls the color of any holidays you type on the calHoliday layer.
 
The first paragraph style you should change is the “cal_base” style, on which all the other styles are based. By default, the font is set to 12-point Times. Change this font, and it will change throughout the calendar.
 
If you’re using Calendar Wizard 2.0 in InDesign CS3, you can also edit the styles in the Cell Styles and Table Styles panels (Figure 7). For example, if you want the cell containing the month name to have a particular fill color, change the cal_header cell style. To change the border around the frames, change the table style called “calendar.”
 
InDesign Calendar layout example
 

Laying out a Document Vertically

InDesign is so flexible, you’d think it would be easy to lay out a spread vertically instead of horizontally—so that the spine is at the top and bottom, which many wall calendars require. Unfortunately, it isn’t easy. However, Anne-Marie Concepción came up with a great workaround you can read in full at InDesignSecrets.com. Here’s the gist:
  1. Lay out the entire spread on a single page. For a 12-month calendar, you’d create 12 tall pages, each containing the image and calendar (Figure A).
  2. Save the InDesign document.
  3. Create a new InDesign document at the finished page size (half the height of the calendar).
  4. Place the original InDesign document into the new one. (If you’re using CS2 or earlier, you’ll need to export a PDF of the tall document first and import that instead.) The first page of the new document should contain the top half of the tall document; the second page contains the lower half; and so on. If you used bleed guides in the original, full-height document, you’ll need to adjust for that in the Import Options dialog box when you import it.
In this model, you design in the tall document and print from the half-height one (Figure B). Then, whenever you edit the tall document, update the modified links in the Links panel of the print version.
 
By the way, if you’re making more than one calendar, just set the styles in one document and then choose Load Paragraph Styles in the Paragraph Styles panel menu to copy them from one file to another.
 

9 – Resize or Realign the Calendars

When you’ve created holiday and text layers, it can be frustrating if one of the grids gets out of alignment (Figure 8). Let’s say you change the height of the month name to be too large for its row. You can use the Type tool to adjust the row height, but now the holiday and text tables are out of alignment. Simply turn to a second script called realignCalendarTables.js, which comes with CalendarWizard.
 
Double-click the realignCalendarTables.js script to launch it. If you have one of the tables selected, it assumes that the selected table is the master—the one all other tables should match. If no calendar frames are selected, the script asks which calendars you want to realign (I usually choose All) and which layer should it assume is the master calendar. This script is easy and painless and saves a huge amount of time (Figure 9).
 
If your frame size changes, you’ll want to use the fitCalendarToFrame.jsx script, which does pretty much exactly what it says: The calendar stretches out to match the new frame size. Note that if you’ve adjusted rows or columns, those changes are lost—all the cells are of equal size after you use this script. Figure 7: CS3’s Cell Styles and Table Styles panels.
 
InDesign Calendar Page Examples
 

Cool Calendars

Building calendars will never be a snap, but with these tools you can change it from a painful, time consuming chore to one you can accomplish quickly. Whether you use a template or a script, you’ll no longer curse under your breath when a client needs a new calendar.

David Blatner is the Editorial Director of InDesign Magazine, the co-author of Real World InDesign CS3, and the co-host of indesignsecrets.com.
More InDesign Tips and Tutorials.
Get instant pricing on full color calendar printing from your InDesign file.

Subscribe to our weekly newsletter and get an instant 20% off your first print project.

Name(Required)
This field is for validation purposes and should be left unchanged.

RELATED MARKETING & DESIGN TIPS

Brochure Design Analysis

This brochure needs to appeal to fly fishers who may have an open day or two during their visit.

Read More >


Bottle Necker Design

Get custom Bottle Neckers, neck tags and bottle neck hangers, popular for wine bottle tags and marketing anything sold in bottles.

Read More >


Using Die Cutting on Postcards

Get unique die cut postcards that will cut through the clutter in the mailbox and get your message noticed.

Read More >


  • « Go to Previous Page
  • Page 1
  • Page 2
  • Page 3
  • Page 4
  • Page 5
  • Interim pages omitted …
  • Page 7
  • Go to Next Page »

Footer

Printing for Less

info@printingforless.com
100 P F L Way, Livingston, MT 59047

800-930-2423

  • Home
  • Products
  • Services
  • Industries
  • Get Samples
  • Direct Mail Marketing Resource Center
  • Printing Resource Center
  • Blogs
  • Templates
  • Terms & Conditions
  • Contact
  • About Printing for Less
  • About P F L
  • Our Team
  • Careers
  • Login

Copyright © 1998-2025 PrintingforLess.com. All Rights Reserved.

logo
  • 800-930-2423
  • Products
  • Direct Mail Marketing
  • Services
  • Industries
  • Direct Mail Marketing Resources
  • Printing & Mailing Resources
  • Get a Quote
  • Contact Us
  • My Login
Catalog Printing

Subscribe to our weekly newsletter and get an instant 20% off your first print project.

Name(Required)
This field is for validation purposes and should be left unchanged.

*Some exclusions apply. See details