Presentation Folder Design Templates
To produce a presentation or pocket folder you have two options to generate the artwork.
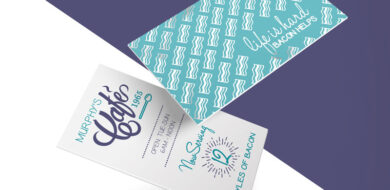
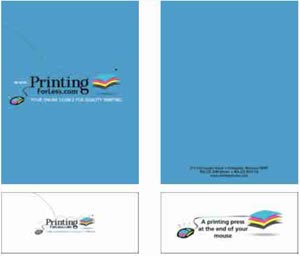
Composed outside and inside as shown below – Follow these instructions
Outside
Inside (if printing on both sides)
Figure 1
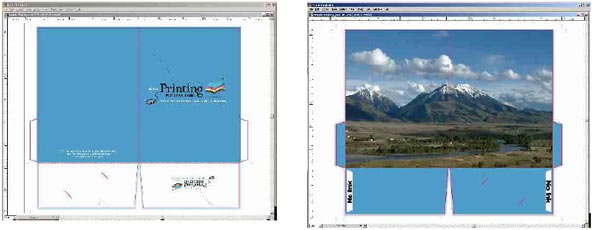
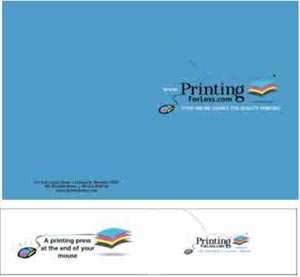
Separate pieces like these – Follow these instructions

Front Cover: 9.25″ x 12.25″
Back Cover: 9.25″ x 12.25″

Pockets 9.25″ x 4.25″

Inside Picture: 18.25″ x 9.25″
Figure 2
Figure 2
Instructions for laying out your artwork
Follow these instructions if you want to layout the complete artwork as shown in Figure 1 above and have one of the software programs listed below. You will first need to download a template from our Presentation Folder Templates Page. Follow the initial instructions below for the program, then follow the General Instructions to add your artwork.
Microsoft Publisher |
|
Quark XPress |
|
Adobe PageMaker |
|
Adobe InDesign |
|
Adobe Illustrator |
|
Adobe PhotoShop |
|
MacroMedia FreeHand |
|
CorelDraw |
|
- After following the previous instructions you should have a screen that looks Figure 3 at right.
- As you work, try not to move or change the elements in the template.
- If the program you are working in has layers, it is best to keep the template layer locked.
- If the program you are working can lock objects, lock all the elements of the template.
- The template used for these instructions is the template for a 2 pocket presentation folder with business card slits on the inside right pocket.
- The red lines indicate where the folder will be cut out (solid) or folded (dotted). The blue lines indicate where bleeds should be.
- When you are done laying out your artwork, move the template to the top layer. The template contains knockouts for the areas that cannot have ink. These areas are necessary for the glue to stick.
(See Figure 7)
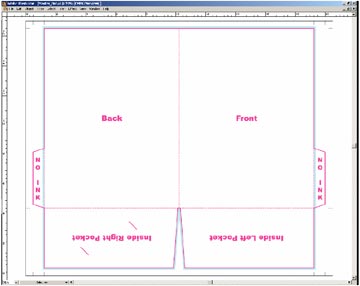
Figure-3
- Begin laying out your artwork.
- Remember to include bleeds (light blue shaded areas on the template) if necessary. Figure 4
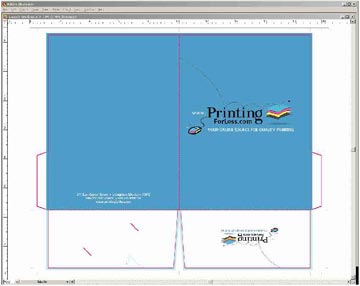
Figure-4
- There is no bleed on the pocket or the spine.
Figure 5 - If your design only has an image on the front, it only needs to bleed 2 sides.
- Leave 1/8″ “Safe” zone from trim and folds (Green area).
- For more information about “Safe Zones,” Click Here While this is for business cards, the principle is the same for any product we print.
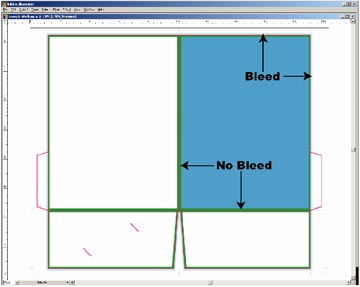
Figure-5
- On the template, there are white knockouts on the glue flaps that only allow a 1/8″ bleed. The rest of the flaps need to be kept free of ink so that the glue will stick. Do not put content in this area. Figure 6
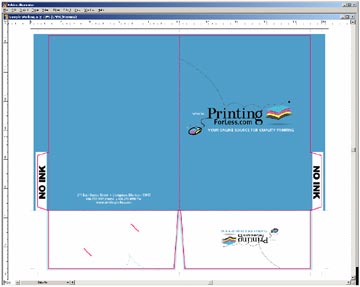
Figure-6
- Final outside assembly, laid out flat. The dotted line represents where it will fold. Figure 7

Figure-7
- Final inside assembly, again laid flat. Figure 8
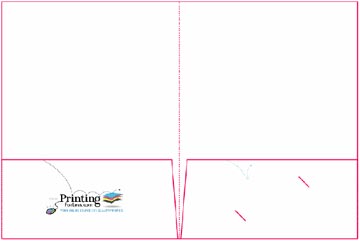
Figure-8
- Note that if you order 4-color on the front and Blank on the back, you can still get printing on the inside pockets which fold up when assembled.
- If you like working with numbers, You can download the file: 9 x 12 Presentation Folder Measurements
- This file has the X-Y Coordinates of all the corners. It also shows the safe zone which is not on the standard template. Figure 9
- This file can also be used for layout if you like.

Figure-9
Instructions for 2 sided printing
- If you are printing on the inside (either 4-color on both sides or 4-color on one side and black on the inside) please download the appropriate template.
- 2 Pockets Inside 1 Pocket Inside Right
- 1 Pocket Inside Left
- Templates for the inside do not contain business card slits, they are on the outside templates only
- Apply the same instructions you used to set up the outside of your folder to set up a file for the inside. You can also just add a second page to your document if that is easier
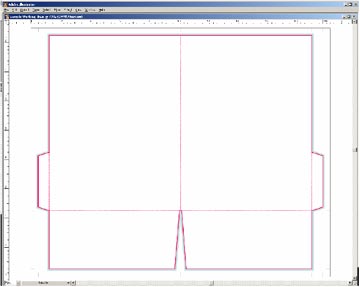
Figure-10
- Notice this time, the bleeds on the glue flaps are to the outer edges. This is because the glue is on the other side.
- Layout your artwork as before.
- The bleeds on the glue flaps are not for the main background picture. Bleed the picture off the edges that will be trimmed, but not past the dotted fold line on the glue flaps as shown here.
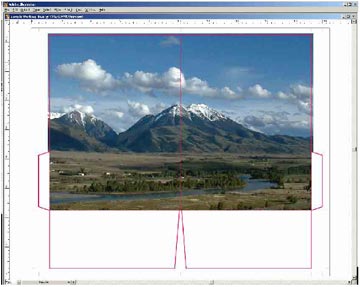
Figure-11
- The bleeds of the glue flaps are there if you choose to print on the inside of the pockets. Figure 12
- This is what it would look like if you wanted to print blue on the inside of the pockets.
- The glue tabs have the blue color so that when they are folded in and the pockets are folded up, everything matches.
- Notice the white knockouts. Once again, this is where the glue needs to stick.
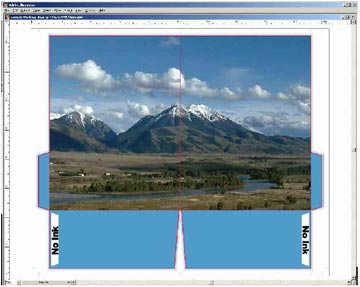
Figure-12
- This is what you end up with inside.
- Remember, the blue on the pockets ended up on the inside of the pockets, not the outside.
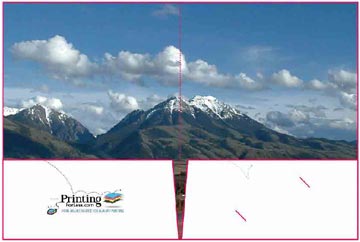
Figure-13
Instructions for laying out your artwork as separate pieces
- Panels can be laid out individually
- Or you can combine panels as you wish.
Instructions for working Individual Panels
- Or you can combine panels as you wish.


Instructions for working with Combined Panels
- If you are going to work with combined panels, use following dimensions.
- Large Panels are 9″ x 12″ so you will need to create artwork that is 18″ x 12″.
- If you have content that will go right to the edge, you need to “bleed” off the edge by 1/8″. If your content is to the edge on all sides, your image for the large panels needs to be 18-1/4″ x 12-1/4″.
- Even though the image does not bleed onto the pockets, it is better that you provide bleed on all sides so things get centered properly.
- The pockets are 9″ x 4″ so you need to create artwork that is 18″ x 4″
- Again please provide bleed if the content goes right to the edge.
- Keep in mind that the pockets are 9 inches at the bottom, but only 8-7/8 at the top, so do not get too close to the edge with content.
- If you are printing on both sides all the dimensions remain the same but remember, when the pockets fold up, the will cover the bottom 4″ of the artwork.