Need help achieving your leadership and logistics goals? You now have access to Duane A. Jones, Major General, USAF (ret), a man with experience and wisdom to spare. His company ServiceBravo is positioned in Colorado Springs, CO and is ready to help you succeed.
Duane is an advocate of the team approach and focuses on helping individuals and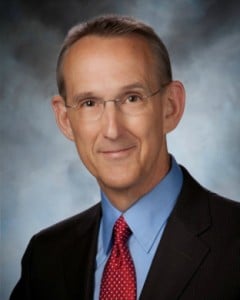
Suffice it to say, if you’ve got things that must get done, and get done well, Duane can help. You can learn more and contact ServiceBravo at this link.
Our Eagle team is assigned to help him, which certainly seems appropriate. After printing his last order of business cards Duane had this to say:
“ The telephone call really made the Eagle team real to me and I was thankful for that.”
Our teams here at Printing for Less are indeed, real people, each one of them dedicated to seeing you achieve success as you define it. If you have a project that needs a personal touch, we are ready and willing to help. Call one of our teams today at 800-930-6040.
Major General Jones we thank you for your business, but more importantly, we thank you for your selfless service to our nation. We don’t take lightly the freedom we have and the opportunity we are afforded by being Citizens of the United States of America. We know it is through the efforts of individuals like you that we have the security we enjoy today. Thank you and may you experience as much success in the civilian arena as you did in the United States Air Force.
Need help with your print? Talk to a live print expert today: 800-930-7978.