If you’ve ever sent something to print and it came back looking far from what you expected, overprinting settings could be the culprit.
What is Overprinting?
Overprinting means that one color gets printed directly on top of another color. Sometimes in printing, it makes sense to allow the top objects in a piece to print directly on top of other fully printed objects. For example, if you’re trying to add some sort of finish to your print products, you’ll need to make sure you have overprint options selected for the objects that will be printed on top.
When you want things to overlap, the object on top must be set to “overprint” instead of “knockout.”
When normally setting up files with one color on top of another, the color underneath gets “knocked out” by the printer, meaning no colors get mixed. This “knocking out” process prevents colors from mixing and getting muddy or overly saturated. The printer won’t print any parts of objects that lie underneath other objects; the overlap won’t be printed with overlapping inks. Instead, it’s as if each part of the visual overlap becomes its own object.
With overprinting though, once the “overprint fill” and/or “overprint stroke” settings get toggled, the first color will be printed, and then the second color will print directly on top of that, so you’ll see a blend of the two colors instead of two colors each in their pure, unblended, intended state.
Why Choose to Overprint?
Some people choose to use overprinting as a sort of insurance policy against the white halos that are possible where two colors meet — that is, if the document registration is less than perfect.
Others choose overprinting for the resulting visual effects – for example, simulating a screen printing effect where an overprinted top layer (such as a shape and/or large block letters) will interact with the colors, textures, and images on the layers below it. Such an effect can give a printed piece much more depth than if it were simply solid color on top. Notice the difference between the following two examples:
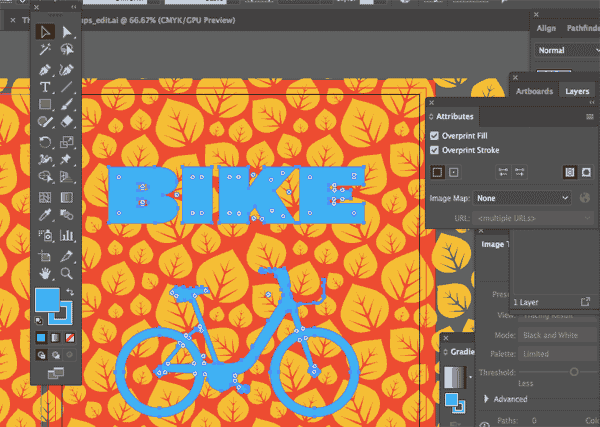
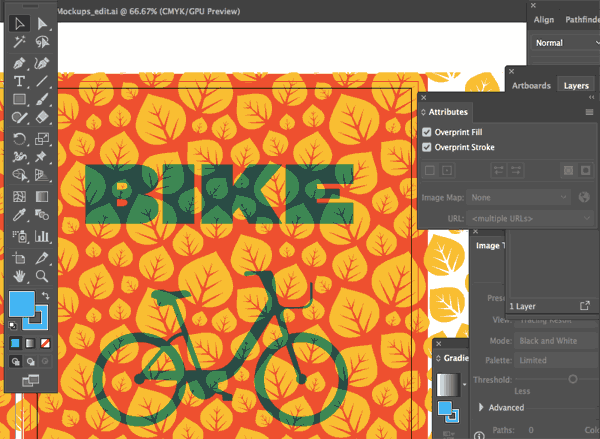
As you can see, when used intentionally, overprinting can add extra visual interest (and even textural interest) to your finished pieces. Overprinting really only becomes a problem when you didn’t realize it was active and your final printed piece arrives looking completely different than your expected design.
Getting Your Overprint Settings Just Right
Overprint settings need to be corrected before your piece goes to print, so that you notice any potential overprinting problems early on in the process. You’ll know what settings need to be corrected once you’ve enabled Overprint Preview. Overprint Preview simulates the printing result of the overprints you’ve set, so that you can be confident your final result comes as close to your expectations as possible — BEFORE sending it to print.
Confirm Document and Color Settings
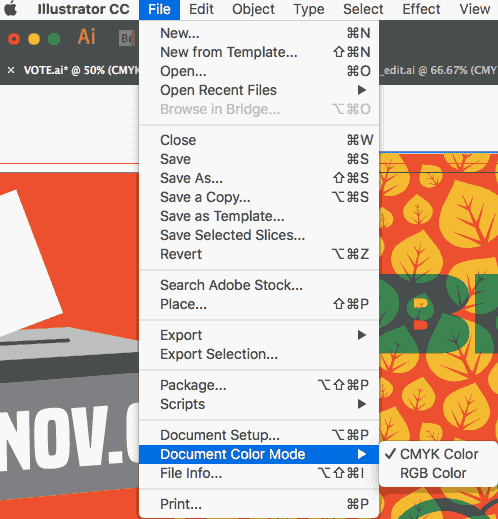
Make sure that your Document Color Mode is set to CMYK, because overprinting only works on spot colors or 100% of process colors C (cyan), M (magenta), Y (yellow), or K (black). If you create spot colors, you’ll see the results you expect. Know that if you use a blend mode (like screen or multiply) or add transparency to spot swatches, you may get unexpected results.
To check your document color mode:
- In Illustrator, go to File → Document Color Mode → CMYK
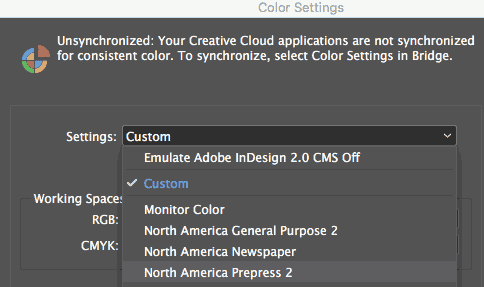
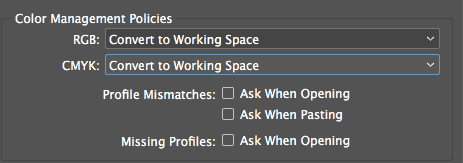
- In InDesign, go to Edit → Color Settings → North America Prepress 2 and then choose “Convert to Working Space” for Color Space
Choosing Overprint Options and Overprint Preview
Overprint Preview mode will produce a good visual estimate of how your piece will look when it prints with the selected overprint settings. Overprint Preview WILL require a lot of your computer memory, so realize that your computer performance may slow (depending on your machine) if it’s continually taxed with rendering a high-resolution display. Overprint Preview is still a great method to preview your piece (and double check the visual display of your settings) before sending a job to print.
Before turning on Overprint Preview, you’ll need to set your overprint options:
- Choose an object that you’d like to have overprint
- Make sure the object is active/selected.
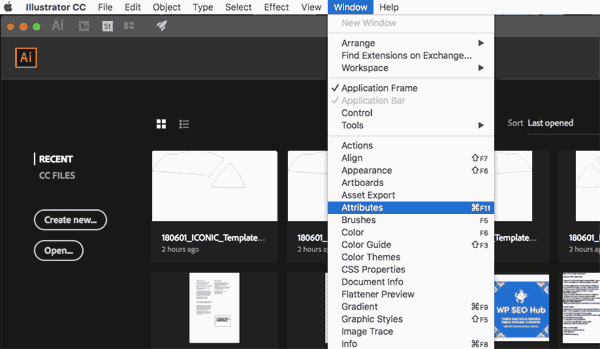
- In Illustrator, choose Window –> Attributes so that the Attributes panel becomes visible
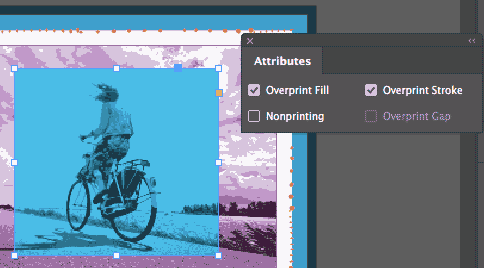
The options you see in the Attributes panel will depend on the object you’ve selected. In this example, the bike has both a stroke AND a fill, so you’ll be able to check a box for either or both. Go ahead and check the box based on your needs/preferences.
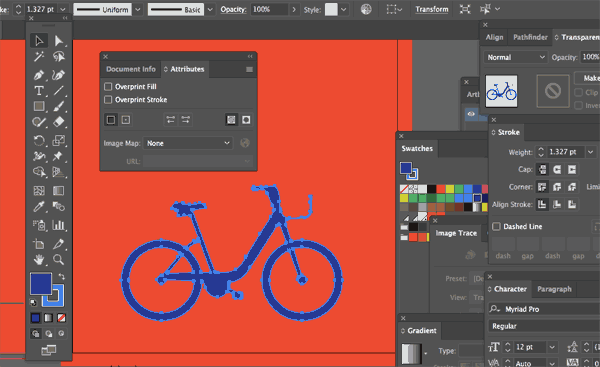
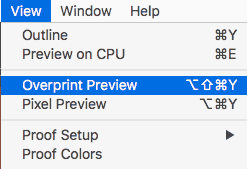
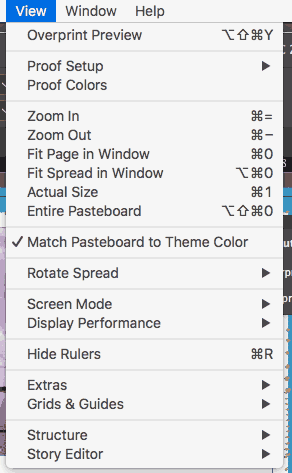
You’ll then go to View → Overprint Preview to check your intended display.

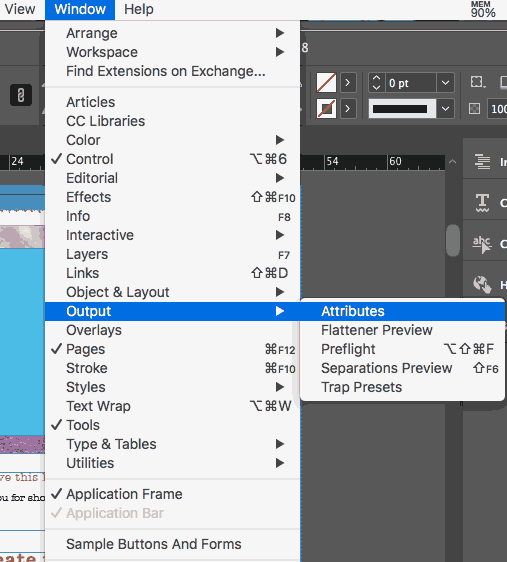
In InDesign, choose Window → Output → Attributes
The options you see in the Attributes panel will depend on the object you’ve selected. In this example, the turquoise box has both a stroke AND a fill, so you’ll be able to check a box for either or both. Go ahead and check the box based on your needs/preferences.
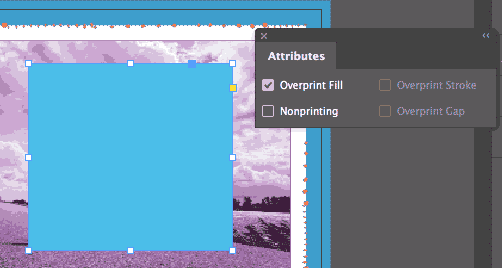
You’ll then go to View → Overprint Preview to check your intended display.
If you expect to be using Overprint Preview frequently and you’d prefer to memorize the shortcut, the shortcut to turn on Overprint Preview mode from within Illustrator or InDesign (it’s the same shortcut in both programs — isn’t Adobe great?!) is Option + Shift + Command + Y (Mac) or Alt + Shift + Ctrl + Y (PC).
Double Checking Overprints in Acrobat Pro
Even after activating and previewing your file’s print display using Overprint Preview, you may want to double check your final file in Adobe Acrobat Pro to make sure you’ll be able to achieve your desired print result. With Acrobat Pro (already included with the Adobe Creative Cloud subscription), you’ll be able to confirm whether your design file can be printed error-free.
Using the Output Preview in Adobe Acrobat
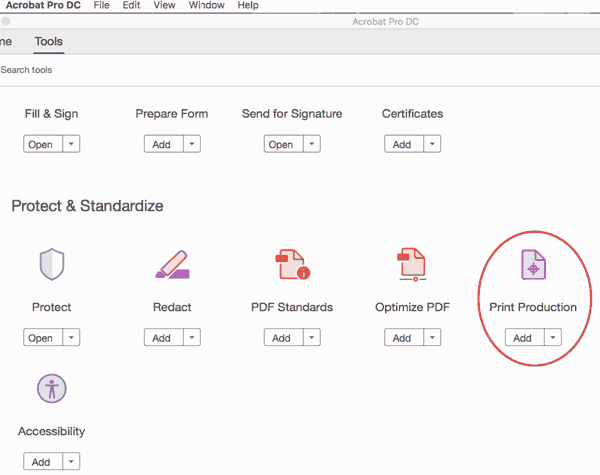
- Open Acrobat and select the “Tools” tab.
- Once in the Tools tab, scroll down to the “Protect and Standardize” section and choose (double-click on) “Print Production.”
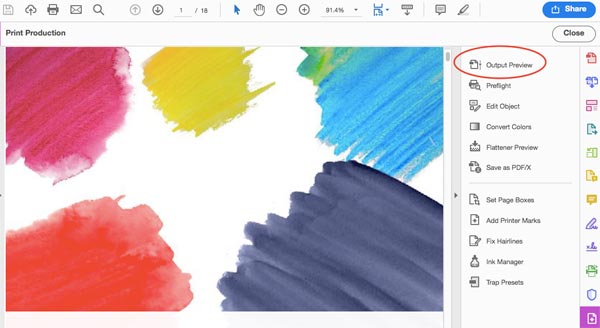
- You’ll see a sidebar pop up to the right of your document pane. Choose (single-click on) “Output Preview.”
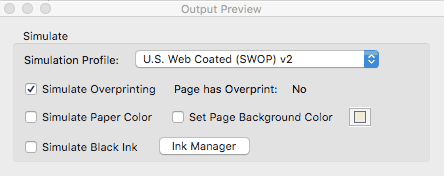
- Under the simulation profile, set the corresponding color space: U.S. Web Coated (SWOP) v2 and check the box next to “Simulate Overprinting” so that you can confirm whether the overprint settings are correct, and any print finishings are set up sufficiently.
- You can further preflight your document (or double check your previous preflighting) via the Output Preview “Show” dropdown menu.
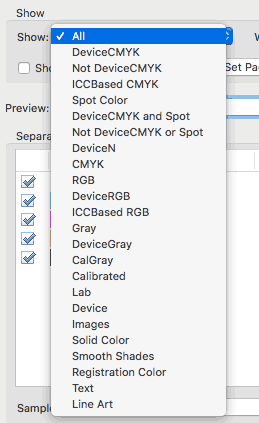
- You can check whether any graphics or images are still set to RGB by choosing “Non-device CMYK” from the “Show” dropdown. Acrobat will then hide anything in the document that’s in CMYK, so that any graphics still displayed are NOT CMYK (and therefore still need to be converted).

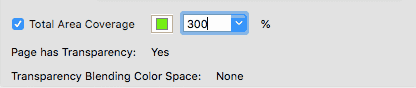
Especially with overprinting, while you’re here in this dialog you’ll want to make double sure that total ink coverage is less than the maximum value (usually 300%). You’ll need to check the box next to “Total Area Coverage” and set the value to 300. Anything in your document over 300 will appear in the selected color (based on this dialog screenshot, that would be green).
If you need help with designing professional print marketing, Printing for Less’s print consultants are available 8am-5pm MT Monday through Friday at (800) 930-7978.