When you use transparency in Adobe Creative Suite applications like Adobe InDesign and Adobe Illustrator, you must take care to follow best practices. This is especially important when transparency must be flattened. We discussed flattening transparency in this blog post.
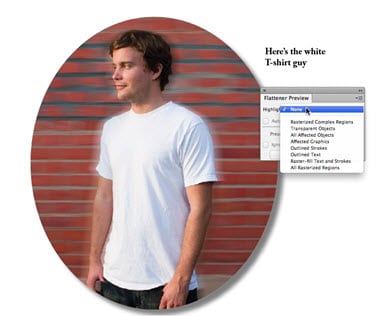
• If possible, place text and vector content higher in the stacking order than objects using transparency. If the transparency is higher, it may interact with the text or vector content, forcing it to be rasterized, making it spread (thicken in weight). In the example below, even though the type doesn’t touch the drop shadow around the image, it could still interact with it.
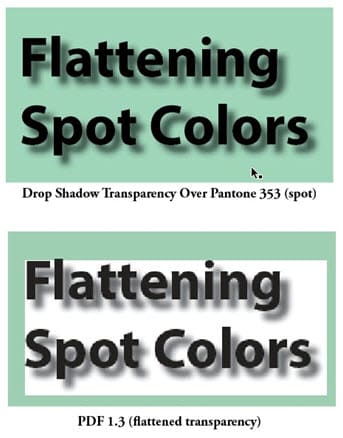
If you’re using spot colors to color objects, and you’re also using transparency, a PostScript raster image processor (the processor that produces the artwork for printing) must use overprinting to image both spot colors and transparency at the same time. If overprinting is not used, you may encounter an effect I call the “white box effect” behind the transparency as you see in the illustration below. When flattening occurs (as by choosing Acrobat 4 or earlier compatibility for a PDF file), the spot colored background doesn’t image properly.
Keep transparency live as long as possible. Use native file formats like Photoshop PSD and Adobe Illustrator AI files instead of saving as EPS files which will flatten the artwork. When creating PDF files from document containing live transparency, use a PDF format with Acrobat 5 compatibility or higher, such as PDF/X-4 that support transparency, if your printer’s workflow supports such files.
Need help with your print? Talk to a live print expert today: 800-930-7978.
